
Introduction
Rear projection film samples help commercial buyers make smarter display decisions before ordering full-size film, projectors, glass panels, acrylic surfaces, or installation labor. Instead of guessing which film will look best in a real environment, businesses can test sample pieces first and compare image quality, brightness, transparency, contrast, glare, and viewing angle.
For buyers, this matters because rear projection film performance depends on the actual space. A film that looks excellent in one showroom may look different in a bright storefront, museum gallery, corporate lobby, trade show booth, hotel, healthcare facility, restaurant, or car dealership. Lighting, glass tint, projector brightness, content style, and viewer distance all affect the final result.
Therefore, rear projection film samples are not just a small product test. They are a risk-reduction tool.
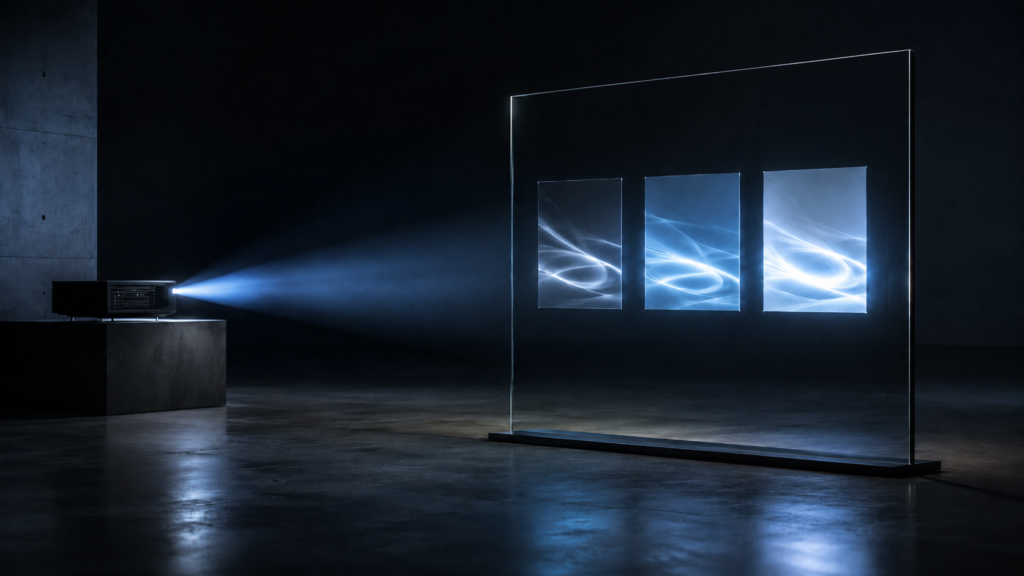
Rear projection film turns glass, acrylic, or Plexiglas into a digital display surface. A projector sits behind the surface and projects visuals onto the film. Viewers see the image from the front. As a result, businesses can create eye-catching glass displays without placing a standard screen in the main viewing area.
However, the right film choice matters. Screen Solutions International offers multiple projection film options through SSIDisplays.com, including Definition Rear Projection Film, Accent Rear Projection Film, Intrigue Rear Projection Film, and Rear Projection Film Samples. RearProjectionFilms.com helps buyers understand these options and plan better commercial display projects.
Before committing to a larger installation, testing samples can help you avoid the wrong film, wrong projector, wrong content style, or wrong display location.
Why Rear Projection Film Samples Matter
Rear projection film is visual. Because of that, buyers often want to judge it from photos or videos. However, photos rarely show the full story. A camera can change brightness, contrast, reflections, and transparency. In addition, online product images cannot recreate the exact lighting conditions in your building.
A sample lets you evaluate the film in your actual space.
That means you can see how the film performs with:
- Your glass or acrylic
- Your lighting
- Your projector
- Your content
- Your viewing distance
- Your customer path
- Your reflections
- Your display size
- Your design goals
As a result, sample testing gives decision-makers real information before they spend more money.
For example, a retailer may discover that one film performs better at night while another looks stronger during the day. A museum may find that a more transparent film creates the right exhibit effect. A corporate office may decide that contrast matters more than transparency. A trade show booth builder may test which film looks best on acrylic panels under convention lighting.
In each case, samples help the buyer make a better choice.
What Comes in a Rear Projection Film Sample Pack?
A rear projection film sample pack may include different film types so buyers can compare performance. Screen Solutions International offers sample options that can help buyers review multiple films before a full installation.
Depending on the sample pack, buyers may compare films such as:
- Definition Rear Projection Film
- Accent Rear Projection Film
- Intrigue Rear Projection Film
- Anti-glare film support options
- Other projection film options when available
Each film has a different visual purpose. Therefore, the best choice depends on the project.
Definition Rear Projection Film
Definition Rear Projection Film is a strong option when clarity, contrast, and image quality matter. It is useful for commercial displays that need sharp visuals on glass or acrylic.
Buyers may test Definition film for:
- Lobby displays
- Retail promotions
- Showroom visuals
- Wayfinding content
- Healthcare communication
- Product videos
- Trade show panels
Accent Rear Projection Film
Accent Rear Projection Film is a high-brightness rear projection option. It can work well in controlled lighting or window display applications that need strong visual presence.
Buyers may test Accent film for:
- Hotel glass walls
- Corporate interiors
- Evening storefront displays
- Museums
- Restaurants
- Controlled-light showrooms
- Event spaces
Intrigue Rear Projection Film
Intrigue Rear Projection Film creates a more transparent, holographic-style visual effect. It can help businesses create a futuristic display experience on glass or acrylic.
Buyers may test Intrigue film for:
- Premium retail activations
- Museum exhibits
- Trade show booths
- Product launches
- Automotive displays
- Technology showrooms
- Interactive glass concepts
Anti-Glare Support
Some projects may also benefit from anti-glare support when reflections affect visibility. Anti-glare film does not replace rear projection film. Instead, it can help reduce glare and reflection when placed correctly in relation to the projection surface.
This can be useful in bright storefronts, glass-heavy lobbies, showrooms, and other high-reflection environments.
How to Test Rear Projection Film Samples Correctly
Testing samples should be more than holding the film up to a window for a few seconds. A proper test should simulate the real installation as closely as possible.
Step 1: Test in the Actual Location
First, place the sample on the same glass, acrylic, or Plexiglas surface where the final display may go. This matters because different surfaces can affect the result.
For example, clear glass may look different than tinted glass. Acrylic may show different reflections than glass. Multi-panel glass may create seams that affect the content. Therefore, test on the real surface whenever possible.
Step 2: Use the Planned Projector
Next, test the film with the projector you plan to use. If the final projector has not been selected, test with a projector that is similar in brightness and throw distance.
Projector brightness can change everything. A film may look strong with one projector and weak with another. Therefore, sample testing helps confirm whether the projector and film work well together.
Step 3: Test During Real Operating Hours
A display may look great in the morning and poor at noon. It may look weak during the day and excellent after sunset. Because of that, test samples during the actual hours when the display will run.
For storefronts, test during daytime, evening, and after dark and for lobbies, test during peak daylight and normal interior lighting. For restaurants and bars, test during service lighting, and for trade shows, test under strong overhead lights when possible.
Step 4: Test Real Content
Do not test only with a random photo. Use content similar to what the final display will show.
Test:
- Product videos
- Motion graphics
- Brand visuals
- High-contrast graphics
- Wayfinding layouts
- Short text
- Abstract backgrounds
- Interactive interface visuals
- Event graphics
- Promotional content
This helps you see whether the content style matches the film.
Step 5: View From Real Angles
Customers rarely stand in one perfect spot. Therefore, walk around and view the sample from multiple angles.
Check visibility from:
- Straight ahead
- Left side
- Right side
- Close range
- Farther away
- Seated positions
- Walking paths
- Entry points
- Aisles
- Waiting areas
This step helps confirm whether the film works for actual viewer behavior.
What to Look for When Comparing Film Samples
A sample test should answer practical questions. Use a simple evaluation process so decision-makers can compare films fairly.
Brightness
Does the image look bright enough in the real space? Does it still stand out when lights are on?
Contrast
Can viewers easily separate the subject from the background? Does the image look clean or washed out?
Transparency
When the projector is off, how visible is the film? Does the film need to disappear, appear frosted, or create a more obvious display zone?
Color
Do colors look accurate and vivid? Do brand colors hold up well on the surface?
Sharpness
Does text or detail look crisp enough? Does the image become soft because of the projector, surface, or film?
Viewing Angle
Can viewers see the display from common approach angles? Does the image fade from the side?
Glare and Reflection
Do lights, windows, cars, people, or polished surfaces reflect on the display? Would anti-glare support help?
Content Readability
Can people read key messages quickly? Are fonts large enough? Are glass seams interfering with text?
Film Appearance
Does the film look good when content is not playing? Does it fit the design of the space?
Rear Projection Film Sample Testing Checklist
Use this quick table while testing samples.
| Test Area | What to Check |
|---|---|
| Surface | Test on the actual glass, acrylic, or Plexiglas |
| Lighting | Test during real operating hours |
| Projector | Use the planned projector or similar brightness |
| Content | Test real campaign or display-style visuals |
| Distance | View from actual customer positions |
| Angle | Walk left, right, close, and far |
| Brightness | Confirm the image stands out |
| Contrast | Check clarity and subject separation |
| Text | Confirm readability from the right distance |
| Reflections | Look for glare from windows and lights |
| Film Appearance | Check how it looks when projector is off |
| Team Feedback | Have decision-makers compare options in person |
This checklist keeps the test practical and focused.
Sample Testing for Different Commercial Spaces
Rear projection film samples can help many types of buyers. However, each environment should test for different priorities.
Retail Storefronts
Retailers should test visibility from outside the store. They should also test during daytime, evening, and nighttime. Since storefronts often face reflections, retailers should pay close attention to glare, contrast, and content readability.
Corporate Lobbies
Corporate teams should test how the film fits the architecture. The display should look premium, clean, and intentional. They should also test how it appears from the entrance, reception desk, seating areas, and elevator paths.
Museums and Exhibits
Museums should test how the film affects the exhibit atmosphere. They should review transparency, readability, glare from exhibit lighting, and whether the digital content supports the artifact or story.
Hotels and Hospitality
Hotels should test how the film looks under lobby, ballroom, restaurant, or lounge lighting. The content should feel elegant and should not overpower the guest experience.
Healthcare Facilities
Healthcare buyers should test readability and calmness. Patient-facing displays should feel clear, helpful, and professional. They should also check whether bright clinical lighting affects the image.
Trade Show Booths
Exhibitors should test film on the same acrylic or glass materials used in the booth. They should also simulate strong overhead lighting and view the sample from aisle distance.
Car Dealerships
Dealerships should test during the brightest part of the day. Showroom glass and polished floors can create reflections, so glare control and projector brightness matter.
Common Sample Testing Mistakes
Testing Only in a Dark Room
A dark room may make any film look better. However, commercial displays need to work in real conditions. Test in the actual space.
Testing With the Wrong Projector
A weak or mismatched projector can give misleading results. Use a projector close to the final setup.
Judging Only From Straight Ahead
Customers may view the display from several angles. Test side angles and walking paths.
Ignoring Content Design
The sample may look poor because the content is weak, not because the film is wrong. Test with better contrast and simpler visuals.
Forgetting to Compare Film-Off Appearance
Some spaces care about how the glass looks when the projector is off. Test the film both on and off.
Skipping Stakeholder Review
Marketing, facilities, design, ownership, and operations teams may all care about different details. Let key decision-makers see the samples before final approval.
Why Samples Can Save Money
Testing rear projection film samples can save money by helping buyers avoid the wrong full-size order. It can also prevent costly installation changes after the project begins.
Sample testing can help avoid:
- Ordering the wrong film type
- Choosing a projector that is too dim
- Installing film in the wrong location
- Designing content that is unreadable
- Ignoring glare problems
- Misjudging transparency
- Underestimating ambient light
- Creating a display that does not match the brand
- Reordering material
- Delaying installation
In addition, samples can help buyers feel more confident. Instead of making a decision from a product page alone, the team can approve the look in person.
How to Prepare Before Ordering Samples
Before ordering samples, gather basic project information.
Helpful details include:
- Project location
- Surface type
- Approximate display size
- Lighting conditions
- Viewing distance
- Desired visual effect
- Projector availability
- Content type
- Installation timeline
- Whether interactivity is needed
- Whether glare is a concern
- Whether the display needs to look transparent when off
This information helps the buyer test the samples more effectively. It also helps SSI guide the project more accurately.
When to Move From Samples to Full Installation
After testing, buyers should be able to choose the best film for the project. Before ordering full-size material, confirm the final details.
Make sure you know:
- Final film type
- Final dimensions
- Projector brightness
- Projector placement
- Surface preparation needs
- Installation method
- Content design requirements
- Lighting conditions
- Glare control plan
- Maintenance access
- Content update workflow
- Lead time
- Custom cut needs
Once those items are clear, the project can move forward with less risk.
Future Trends in Rear Projection Film Testing
Rear projection film sample testing will become even more important as businesses use glass displays in more creative ways.
First, more projects will involve custom glass shapes, curved surfaces, and multi-panel architectural displays. Samples will help buyers understand how film behaves on those surfaces.
Second, interactive glass will become more common. Businesses will need to test how film works with touch frames, sensors, cameras, and interface visuals.
Third, more storefronts will use rear projection film for digital advertising. Because storefront lighting is challenging, sample testing will help buyers choose the right film and projector.
Fourth, hybrid systems will grow. Businesses may test rear projection film alongside anti-glare film, transparent OLED, LED displays, and standard signage.
Finally, buyers will expect stronger ROI. Sample testing supports that goal because it improves decision quality before installation.
FAQ
Should I order rear projection film samples before buying full-size film?
Yes. Ordering samples is one of the best ways to test brightness, contrast, transparency, viewing angle, and glare before committing to a larger installation.
What should I test with rear projection film samples?
Test the samples on the actual glass or acrylic surface, with the planned projector, during real operating hours, and with content similar to the final display.
Can samples show which film works best in bright spaces?
Yes. Samples can help compare film performance under real lighting conditions. Bright spaces may need stronger projector planning, higher-contrast content, or anti-glare support.
Do rear projection film samples work on acrylic?
Rear projection films can be used on glass, acrylic, or Plexiglas depending on the product and project. Testing samples helps confirm the look on your specific surface.
How many people should review the samples?
Ideally, include anyone involved in the decision, such as marketing, facilities, design, ownership, AV, and operations. Different teams may notice different performance details.
Why Choose Screen Solutions International
Screen Solutions International helps commercial buyers compare projection film options before investing in a full installation. SSI offers rear projection film samples, multiple film types, anti-glare support, digital signage products, transparent displays, LED video walls, projector enclosures, interactive kiosks, and custom experiential display systems.
This matters because rear projection film projects need the right combination of film, projector, surface, lighting, content, and installation planning. Sample testing helps make those decisions easier.
For rear projection education and ideas, visit RearProjectionFilms.com. For film samples and product support, visit SSIDisplays.com. To discuss a project, call 888-631-5880.
Final Takeaway
Rear projection film samples help businesses choose the right film before committing to a full installation. They allow buyers to test brightness, contrast, transparency, viewing angle, glare, content readability, and film appearance in the real environment.
In summary, sample testing saves time, reduces risk, and improves project confidence. Before ordering full-size rear projection film, test samples on the actual surface, with real lighting, real content, and real viewing angles.
To order samples or plan a rear projection film project, visit RearProjectionFilms.com or call Screen Solutions International at 888-631-5880.
Sources
Internal SSI Links
- SSIDisplays.com
- Rear Projection Films
- Projection Film Options
- Definition Rear Projection Film
- Accent Rear Projection Film
- Intrigue Rear Projection Film
- Rear Projection Film Samples
- Anti-Glare Film