
Introduction
A rear projection film installation checklist helps commercial buyers avoid expensive mistakes before ordering film, projectors, glass panels, acrylic surfaces, or supporting display equipment. Rear projection film can create a powerful visual experience, but the final result depends on more than the film itself.
For businesses, this matters because rear projection film projects often involve several moving parts. The display surface, film type, projector brightness, throw distance, lighting, content, viewing angle, installation method, cleaning process, and maintenance plan all affect performance. If one of those pieces gets ignored, the display may look dim, uneven, reflective, misaligned, or difficult to read.
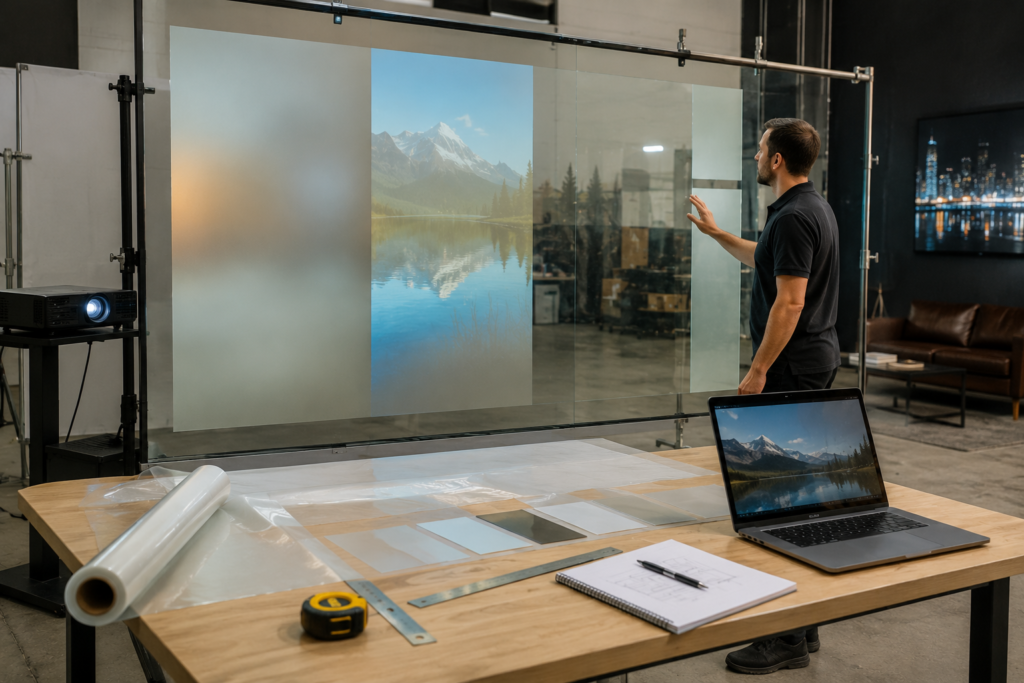
Rear projection film turns glass, acrylic, or Plexiglas into a digital display surface. A projector sits behind the surface and projects content onto the film. Viewers see the content from the front. As a result, businesses can create a sleek digital display without placing a traditional screen in the main viewing area.
However, a successful project starts before installation day. It starts with planning.
RearProjectionFilms.com helps businesses understand how rear projection film works, where it fits best, and how to plan stronger commercial display projects. Screen Solutions International supports those projects through SSIDisplays.com with rear projection films, projection film samples, digital signage, transparent displays, projector enclosures, anti-glare film, and custom display solutions. SSI notes that its rear projection films apply to clear surfaces and provide digital signage “practically anywhere,” with multiple film options for different installation types.
Use this checklist before ordering rear projection film so your project starts with the right questions.
Why Rear Projection Film Planning Matters
Rear projection film can look clean, futuristic, and premium. However, it is not a plug-and-play sticker for every glass surface. It works best when the film, projector, environment, and content are planned together.
For example, a retail window with direct sunlight needs different planning than a museum exhibit in a controlled gallery. A corporate lobby glass wall needs different projector placement than a trade show acrylic panel. Similarly, an interactive display needs different hardware than a simple looping video display.
Therefore, buyers should not start by asking only, “How much film do I need?”
Instead, they should ask:
- What is the display supposed to accomplish?
- Who will view it?
- Where will people stand?
- How bright is the space?
- What type of glass or acrylic will hold the film?
- Where will the projector go?
- What content will play?
- Will the display need touch or sensor interaction?
- How will the system be maintained?
- Should the project use anti-glare support?
Once these questions are clear, the ordering process becomes much easier.
Step 1: Define the Business Goal
First, define the purpose of the rear projection film display. A display without a clear goal can become decoration instead of a business tool.
Common business goals include:
- Attracting storefront traffic
- Improving lobby branding
- Promoting products or services
- Supporting wayfinding
- Creating an immersive exhibit
- Enhancing a trade show booth
- Improving a showroom experience
- Supporting private events
- Educating customers or visitors
- Capturing leads through interactivity
- Creating a premium architectural feature
The goal affects every other decision. For example, a storefront display may need bold visuals and strong brightness. A museum exhibit may need subtle storytelling and controlled light. A corporate lobby display may need polished brand visuals and clean integration. A trade show display may need portability and fast setup.
As a result, the business goal should come before the product order.
Step 2: Choose the Right Surface
Rear projection film usually applies to clear surfaces such as glass, acrylic, or Plexiglas. However, not every surface performs the same.
Before ordering, review the surface carefully.
Important surface questions include:
- Is the surface glass, acrylic, or Plexiglas?
- Is the surface flat or curved?
- Is the glass tinted?
- Is the surface clean and smooth?
- Are there scratches, chips, coatings, or residue?
- Does the surface face direct sunlight?
- Will viewers see the display from one side or multiple sides?
- Is the surface permanent or temporary?
- Will the film need to fit multiple panels?
- Are there seams between glass sections?
Surface condition matters because imperfections can affect how the image looks. In addition, segmented glass panels may create visible lines through projected content. Those lines may be acceptable in some architectural displays, but they should be considered during content design.
If the project uses multiple glass panels, content should account for panel breaks and mullions. Avoid placing important product details, faces, text, or logos directly across seams.
Step 3: Measure the Display Area Correctly
Accurate measurements are essential. Projection films are commonly ordered by size, roll width, or custom cut requirements. Mistakes can delay the project or create waste.
Before ordering, measure:
- Total glass width
- Total glass height
- Visible display area
- Individual panel sizes
- Distance between seams
- Border or frame dimensions
- Projector distance from the surface
- Available space behind the glass
- Customer viewing distance
- Ceiling height or mounting location
Additionally, document whether the film needs to cover the entire glass surface or only a specific display zone.
For example, a business may have a 10-foot-wide glass wall but only need a 6-foot-wide projected image. In that case, the film layout and projector plan should match the content strategy.
Step 4: Select the Right Rear Projection Film Type
Not all rear projection films create the same look. Different films support different levels of brightness, transparency, contrast, and visual style.
Screen Solutions International offers multiple projection film options, including Definition, Accent, Intrigue, and sample packs that let buyers compare options before committing. SSI’s standard rear projection sample pack includes Accent, Definition, and Intrigue films, while larger starter/sample options may include Anti-Glare film as well.
Definition Rear Projection Film
Definition Rear Projection Film is a strong choice when the project needs contrast and improved image clarity. SSI notes that Definition film adds contrast, rejects ambient light, and can be used in direct sunlight.
This can make it useful for commercial buyers who need better visibility in brighter spaces.
Accent Rear Projection Film
Accent Rear Projection Film is a high-brightness film option. SSI describes Accent as best used in light-controlled environments or dusk-to-dawn window displays.
This can make it a good fit for controlled lobbies, museums, hospitality spaces, evening storefront displays, and interior architectural displays.
Intrigue Rear Projection Film
Intrigue Rear Projection Film creates a holographic-style display effect. SSI describes Intrigue as approximately 96% colorless and transparent, with the ability to create a striking holographic, 3D, or floating image effect on glass or acrylic.
This makes it useful for premium brand activations, retail displays, exhibits, events, and futuristic commercial environments.
Definition Pro Rear Projection Film
Definition Pro can support more demanding visibility goals. SSI notes that Definition Pro rejects ambient light, adds significant contrast, can be used in direct sunlight, and requires about 20% more lumens than Definition Film.
This means projector planning becomes especially important when using higher-performance film options.
Step 5: Test Samples Before Full Installation
Sample testing is one of the smartest steps in any rear projection film project. Photos and product descriptions help, but they cannot fully predict how film will look in your exact environment.
A sample test lets you evaluate:
- Brightness
- Contrast
- Transparency
- Viewing angle
- Glare
- Color performance
- Image sharpness
- Film appearance when the projector is off
- Performance during daytime
- Performance during evening
- Compatibility with your glass or acrylic
- Content readability
Additionally, sample testing helps decision-makers compare film options side by side. This can prevent the wrong film from being ordered for the space.
Step 6: Plan Projector Brightness and Placement
Rear projection film needs a projector behind the surface. Therefore, projector planning is critical.
Key projector factors include:
- Brightness/lumens
- Throw distance
- Lens type
- Image size
- Resolution
- Mounting position
- Ventilation
- Noise level
- Heat output
- Maintenance access
- Cable routing
- Keystone correction
- Alignment control
- Operating schedule
A large projected image spreads light across a bigger area. Therefore, larger displays usually need more projector brightness. Bright environments also need stronger projector planning.
Additionally, projector placement must support the physical space. If there is no room behind the glass, the project may need a different layout, a short-throw projector, an ultra-short-throw projector, or a different display technology.
Step 7: Review Ambient Light and Glare
Lighting can make or break a rear projection film display. Even the right film and projector can struggle if the display faces direct sunlight or harsh reflections.
Review these lighting conditions before ordering:
- Direct sunlight
- Window orientation
- Overhead lights
- Spotlights
- Reflections from polished floors
- Reflections from nearby glass
- Exterior headlights
- Mall or lobby lighting
- Daytime vs. nighttime conditions
- Seasonal changes in sunlight
- Shadows from furniture or fixtures
In some projects, anti-glare film may help reduce front-side reflections. SSI’s anti-glare film can support rear projection film projects by reducing glare and reflection from the front of the display, depending on placement and application. Therefore, anti-glare planning should happen early if the space has reflective conditions.
Step 8: Design Content for Rear Projection Film
Rear projection film content should not look like a website, brochure, or small-screen presentation. It should be designed for glass, distance, motion, and real-world viewing conditions.
Strong content usually includes:
- Large visuals
- High contrast
- Short text
- Simple layouts
- Clean motion
- Bright focal points
- Clear product or brand imagery
- Limited visual clutter
- Smooth looping
- Content that works from several angles
Avoid:
- Small text
- Thin fonts
- Dense paragraphs
- Low-contrast designs
- Busy backgrounds
- Too many messages at once
- Important content across glass seams
- Dark visuals in bright environments
AVIXA identifies digital signage as a Pro AV category that bridges AV, IT, and content, which reinforces an important point: a display project is not just hardware. The content strategy matters too.
Step 9: Decide Whether the Display Needs Interactivity
Some rear projection film installations only need passive video or graphics. Others need touch, sensors, RFID, NFC, cameras, motion triggers, or mobile integration.
If the display needs interactivity, plan that before ordering.
Interactive planning questions include:
- Will users touch the glass?
- Will the display need an infrared touch frame?
- Will it use sensors or cameras?
- Will it connect to a kiosk system?
- Will it collect leads?
- Will it show product options?
- Will it support wayfinding?
- Will it connect to a website or database?
- Will staff need to update the interactive content?
- Will the system need internet access?
- Will cleaning routines affect touch hardware?
Interactivity can increase engagement, but it also adds complexity. Therefore, hardware, software, content, and installation teams should coordinate early.
Step 10: Plan Installation Access and Maintenance
A rear projection film system needs more than a one-time install. It also needs long-term access for cleaning, content updates, projector maintenance, and occasional adjustments.
Plan for:
- Film cleaning
- Glass cleaning
- Projector access
- Filter replacement if applicable
- Lamp or laser projector maintenance
- Media player access
- Cable access
- Software updates
- Content changes
- Alignment adjustments
- Ventilation checks
- Safety inspections
Additionally, businesses should assign an internal owner for content updates. A display that shows stale content loses value over time.
Step 11: Confirm Safety, Codes, and Environment
Commercial spaces often require safety review. This is especially important in public venues, healthcare spaces, hotels, trade shows, schools, government facilities, and high-traffic retail environments.
Review:
- Fire and building codes
- Electrical requirements
- Cable management
- Trip hazards
- Mounting safety
- Glass safety
- Public access
- ADA considerations
- Cleaning chemicals
- Heat and ventilation
- Emergency exits
- Venue rules
- Insurance requirements
- Installer requirements
Additionally, if the display appears in a customer-facing space, it should not block visibility, emergency signage, accessibility paths, or required safety information.
Step 12: Build a Content Update Plan
Rear projection film creates the most value when content stays fresh. Therefore, businesses should plan a content calendar before launch.
Possible content updates include:
- Monthly promotions
- Seasonal visuals
- Product launches
- Event schedules
- Welcome messages
- Brand campaigns
- Wayfinding updates
- Educational content
- Sponsor messaging
- Holiday visuals
- New service announcements
- Trade show demos
- Customer experience loops
A content update plan keeps the display active and useful. It also helps justify the investment over time.
Rear Projection Film Installation Checklist Table
| Planning Area | Questions to Answer Before Ordering |
|---|---|
| Business Goal | What should the display accomplish? |
| Surface | Is the surface glass, acrylic, or Plexiglas? |
| Measurements | What are the exact width, height, and panel sizes? |
| Film Type | Which film matches the lighting and visual goal? |
| Samples | Have you tested samples in the actual space? |
| Projector | Is there enough brightness and throw distance? |
| Lighting | Will daylight or overhead lights affect visibility? |
| Glare | Is anti-glare support needed? |
| Content | Is the content designed for projection on glass? |
| Interactivity | Will the display need touch or sensors? |
| Maintenance | Can staff access the projector and media player? |
| Safety | Are power, mounting, and public access planned? |
| Updates | Who will manage content after launch? |
Common Mistakes to Avoid
Ordering Film Before Testing the Space
A film may look different in your environment than it does in a sample photo. Therefore, test before scaling.
Forgetting Projector Space
Rear projection requires space behind the surface. If that space does not exist, the project needs redesign.
Choosing the Wrong Film for the Lighting
Bright storefronts, dim museums, and corporate lobbies need different film and projector strategies.
Using Weak Content
Poor content can make a strong display look average. Design visuals specifically for rear projection film.
Ignoring Maintenance
Projectors, media players, and cables need access. A clean design still needs practical service planning.
Waiting Too Long to Ask About Custom Cuts
Custom layouts, segmented glass, and special cuts may require extra planning and lead time. SSI notes that custom cutting requests may involve additional processing fees and extended lead times, so buyers should review complex layouts before ordering.
Future Trends in Rear Projection Film Installation
Rear projection film projects will continue becoming more integrated with architecture, interactive technology, and content management systems.
First, more businesses will plan digital display surfaces earlier in the design process. Instead of adding screens after construction, architects and designers will build display-ready glass into lobbies, showrooms, exhibits, and storefronts.
Second, interactive glass will become more common. Touch overlays, sensors, cameras, and mobile triggers can turn rear projection film into a responsive experience.
Third, anti-glare and visibility planning will become more important as displays move into brighter public spaces.
Fourth, hybrid display systems will grow. Businesses will combine rear projection film, LED video walls, transparent OLED, digital signage, high-bright displays, and interactive kiosks to create complete display ecosystems.
Finally, buyers will focus more on long-term ROI. That means better planning, stronger content, easier maintenance, and more frequent updates.
FAQ
What should I know before ordering rear projection film?
Before ordering rear projection film, confirm your glass or acrylic size, lighting conditions, projector space, film type, viewing distance, content plan, and maintenance access. Testing samples first is strongly recommended.
Does rear projection film work on glass?
Yes. Rear projection film is designed to apply to clear surfaces such as glass, acrylic, or Plexiglas, depending on the project.
Do I need a projector for rear projection film?
Yes. Rear projection film requires a projector behind the display surface. The projector sends the image onto the film so viewers can see it from the front.
Should I test rear projection film samples?
Yes. Sample testing helps you compare brightness, contrast, transparency, finish, and performance in your actual environment.
Can rear projection film be interactive?
Yes. Rear projection film can support interactive experiences when paired with touch frames, sensors, cameras, RFID, NFC, or custom software.
Why Choose Screen Solutions International
Screen Solutions International helps commercial buyers plan display systems that work in real spaces. SSI offers rear projection films, projection film samples, anti-glare film, transparent OLED displays, LED video walls, high-bright displays, interactive kiosks, projector enclosures, and custom experiential displays.
This matters because a successful rear projection film installation involves more than film. It needs the right surface, projector, content, lighting plan, installation approach, and long-term update strategy.
For rear projection education and ideas, visit RearProjectionFilms.com. For product options and project support, visit SSIDisplays.com. To discuss a project, call 888-631-5880.
Final Takeaway
A rear projection film installation checklist helps businesses plan smarter before ordering. The best results come from matching the right film, projector, surface, lighting, content, and maintenance plan to the business goal.
In summary, rear projection film can turn glass into a powerful digital display surface. However, strong results require planning. By testing samples, reviewing the environment, choosing the right SSI film option, and designing content for glass, businesses can create a cleaner, brighter, and more effective rear projection display.
To start planning your rear projection film project, visit RearProjectionFilms.com or call Screen Solutions International at 888-631-5880.
Sources
Internal SSI Links
- SSIDisplays.com
- Rear Projection Films
- Projection Film Options
- Definition Rear Projection Film
- Definition Pro Rear Projection Film
- Accent Rear Projection Film
- Intrigue Rear Projection Film
- Rear Projection Film Samples
- Anti-Glare Film